If you can’t find what you want…

…make it!  I’m a DIY kind of girl, always have been. I’m frugal, and learned many skills from my mom; ours was a big family with a limited income, she made do, did a lot of the projects around the house, figured out how to fix things herself. I still tend to do things myself rather than pay someone to do it. Last weekend, I tore the mantle and fireplace surround (with trim all the way to the high ceiling) off my fireplace by myself rather than pay the contractor to do it. Last Fall, when I moved, I wanted a jewelry case to hang in my walk-in closet, that would protect my silver pieces from tarnishing. There are lots on the market, but they were not for my frugal self. And, I decided I didn’t need a large one.

So, I went to Hobby Lobby, bought a 10″ x 20″ shadow box frame, and pulled out the poorly installed canvas backing. I couldn’t find a white frame, so I bought a black one and spray painted it with white enamel that I happened to have on hand. I didn’t take the glass out, I just very carefully taped newspaper over both sides of the glass.

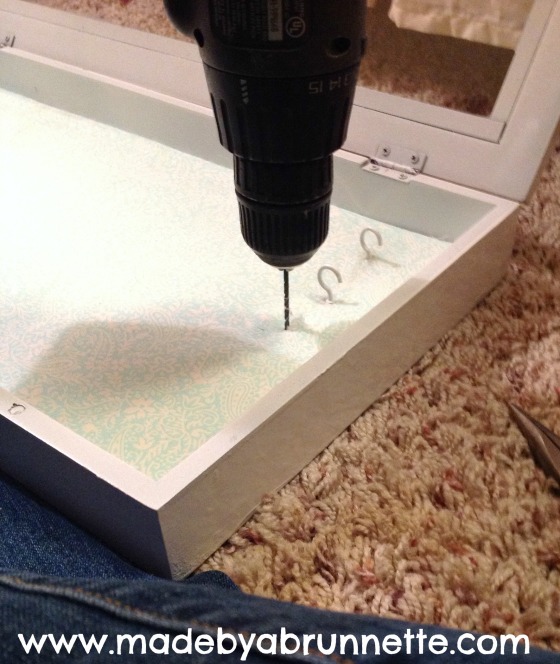
Cut a piece of mat board to fit, and covered that in batting and fabric to match my paint color:JewelryCase1 First, folded in and glued the batting…JewelryCase2 Then did the same with the fabric. The front side looked like this when I was done:JewelryCase3 I glued this into the bottom/back of the shadow box, then drilled holes for cup hooks that I had also spray painted white. (If I were to do this again, I would have used an awl to make my pilot holes–the drill bit got wrapped in batting each time and was a bit of a pain):JewelryCase4 Once the cup hooks were all screwed in:JewelryCase5 And voila! The finished project hanging on the wall of my closet:
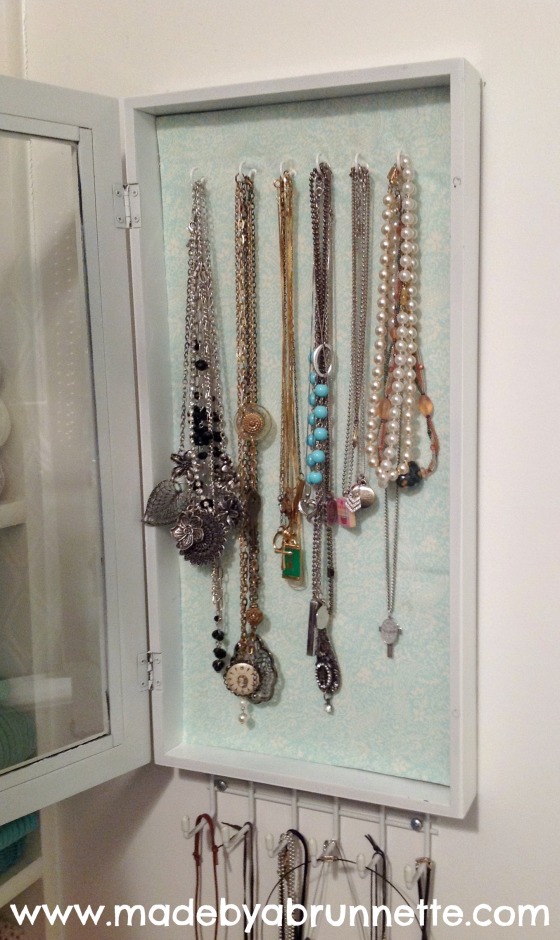
JewelryCase6 The wire rack below it is what I have used for years for my necklaces/chains, but anything silver always tarnished quickly hanging out in the open air. Really, a fairly easy project that cost me about $22 total. JewelryCase7Now to get that fireplace surround re-done…

Happy creating,

Doris

From dinosaur to…

…possibly the cutest “up-cycle” project I’ve ever completed.

Over a year ago, I was trying to help my mom sell an entertainment center via craigslist and Facebook. It didn’t fit her new television, so it had been moved to her garage. Well, we couldn’t sell it, we couldn’t even give it away — literally — our local salvage/resale shops won’t take them. So, it became a dinosaur taking up space in my mom’s garage.

But then I saw this, the piece in the before pic is almost an EXACT version of my mom’s dinosaur, shown here:

EntertainmentCenterI sent the pin to my sister and a plan was hatched.

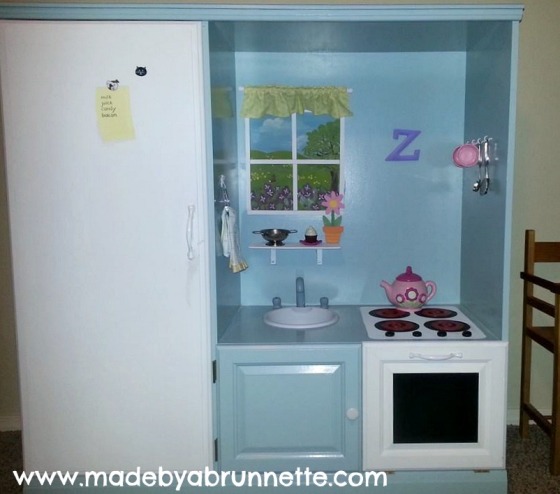
Just before Christmas, we moved the entertainment center from mom’s garage to my garage, and we started painting and remaking it as a surprise for my niece.  We had a lot of fun brainstorming ideas… the sink is a cheap plastic mixing bowl, the faucet is the top of an m&m candy cane that we spray painted, the oven “rack” is a shelf organizer, the burners and stove and faucet knobs are all from the unfinished wood aisle at Hobby Lobby. We used leftover paint from other projects, and  bought kitchen cabinet knobs to use as handles. The inside of the fridge is painted all white, and the shelves are repurposed as refrigerator shelves. The investment in this project in terms of dollars was pretty small.

CollageForBlogWe cut a piece of MDF for the “wall” of the kitchen, my sister didn’t want a cut out (like the Pinterest piece had) in it since it would sit up against the wall in their play area, so I painted an outdoor scene, blue sky with fluffy clouds, flowers and a bunny in the yard, framed it out with 1/2″ trim board for window “mullions”. I also painted a grocery list on the “fridge” door, and a kitty and puppy magnet. (Her grocery list reads milk, juice, candy, bacon — likely a list Zoe would come up with if you asked her what we should buy at the grocery store!)

ZoeKitchen3I made a valance for her “window” out of this yellow Sunkissed fabric by Sweetwater, and trimmed the wash clothes my sister bought for “towels” in the same. The “towel ring” is a plastic scarf ring from Target that I made a little leather holder for. We added cup rings to the opposite wall to hold her utensils.

ZoeKitchen2

ZoeKitchen1We moved it fro my garage, over to my sister’s basement play area on New Year’s weekend, while Zoe was napping. When we had it moved it, I went into her room to wake her up, and I carried her downstairs to see her surprise and she woke up in a BIG hurry when she saw it! (Her brothers were just as excited) A few weeks later, I finished the little apron I made her to match–once she tried it on, she wore it the rest of the day!

ZoeApronCollageShe loves her kitchen, our mom loves that it’s not sitting in her garage anymore, and I love that we didn’t have to send it to the landfill. Win-win.

Happy creating,

Doris

Wrapped Up in Love (Part I)

When my husband passed away, my life changed forever. But, it wasn’t just me whose life changed forever that day; he has two beautiful daughters in their mid-twenties who lost their awesome Dad way too soon. He also has a now 2-year-old granddaughter who won’t have a memory of the grandpa that was so enamored with her. And his brother lost his only sibling. Not a day has gone by that I haven’t given thought to the loss they all feel as well.

I knew I wanted to make something for his daughters as a special memory of their Dad–using his clothes, the signature jeans and t-shirts he lived in. I’m not a fan of traditional t-shirt quilts, and the carpenter jeans he wore to work every day were so a part of his persona, I really wanted to incorporate the denim as well. I found this inspiration quilt — and at a retreat in October, I started making a quilt for each daughter with the idea of finishing them for Christmas.

I finished most of the top for his youngest that weekend:

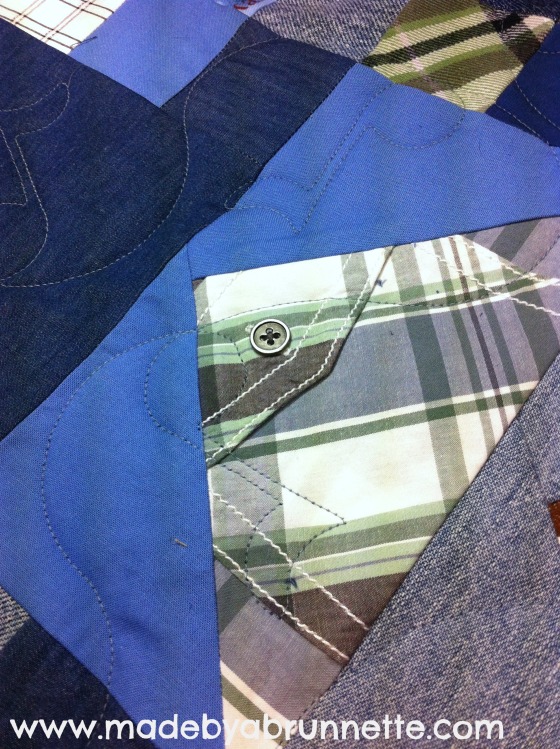
EliceTop1It includes pieces of t-shirts from places they toured together, a camp they shared memories of, from her college, there’s even a hammer loop from one of his pairs of carpenter jeans (both quilts have pockets from carpenter jeans, button plackets from his shirts, t-shirt collars, etc.):

EliceQuilt1There is some Minnesota fabric in each quilt (their home state), and of course, plaid flannel, another staple of his wardrobe:

EliceQuilt2

EliceQuilt3The label on each quilt (on the front bottom right) is a banjo–an instrument he taught himself to play over the past few years.

LabelI finished the second quilt top on a sewing weekend in early December:

LacyTop1His oldest was on the first Des Moines based roller derby team, so his Derby Dames t-shirt went into her quilt, as well as a few others that I knew would be meaningful to her:

LacyQuilt2

LacyQuilt4

LacyQuilting2I used some Chambray in both quilts for the look of denim without making the quilt too heavy:

LacyQuilting1

LacyQuilt3

LacyQuilt1The quilting is an overall pattern of music notes and meandering. The backing is Navy minky, because I wanted these quilts to be something they could snuggle up in; a comfort quilt. Trina helped me get these quilted in the last few days before Christmas.

BackingQuilting

Here is a full shot of both quilts, photos I took before gifting them and then lost when I got a new phone a few days later. This collage was the only photo that survived because I had posted it to Facebook. Oops. Thankfully the girls each emailed me a few photos of their finished quilts so I could show them here. Collage3

Frank would have thought these quilts were so cool, as he would the quilt I’m planning to show you in my next post, it makes me smile to imagine what his reaction would’ve been. I hope they bring a little bit of that same comfort to his girls.

For the love of handmade gifts

In June 2009, I posted about a Maid of Honor dress I made into a toddler dress and matching doll dress for my best friend’s daughter (it’s roughly a size 2T). I wore the original dress in her parents’ May 2000 wedding.

Well, my little friend will turn six on June 5th. Last month, I received a text message with this photo (the one on the left) and the message “it still fits!”
Brdiesmaid Dress Remake Collage1Skinny-minny is growing like a weed, but she hasn’t gotten any bigger around in almost four years!  The pics on the right are the original photos I took before gifting it to her in 2009.

That text message made my MONTH.

a MUST Read:

My little space here has been quiet for some time; for various reasons. I’m overwhelmed with my job, the business, finding time for family, packing to move, not yet closing on the house we are buying; I’m lucky to get anything finished, much less find time to blog about it.

That, and I’ve become very disenchanted with the internet, social media, etc. in general lately… finding very little of value, and little that lifts my spirit or enhances my day. (In fact, if anything it does exactly the opposite). BUT, this morning I read the best thing I’ve seen online in ages:

It involves this Before and After photos:

SEWING ROOM_BEFORE

EM_SEWING ROOM1_9

Impressive, huh?!  That’s only part of the story… Head over here to read the rest.

Holy Masquerade, Batman!

BLOGTOBERFEST, Day 27

(That’s an actual Robin quote, btw)  So, the big reveal… no one got both correct, but it would have been an impressive guess if you had–

We were the Joker and Catwoman (based on the 1966 television portrayals by Cesar Romero and Julie Newmar).  The originals:

and us, as Joker and Catwoman:

And yes, I made the costumes.  How?  It started with a trip to Goodwill where we bought:

And then a stop into the supermarket two doors down from Goodwill to buy some Rit Fabric Dye (the green dye was intended for Joker’s shirt, but we ended up not using it):

I started by washing everything, the Linen capri & blouse set and the green shirt were washed in a bath of Color Remover (which didn’t really do a thing); then I soaked the linen set in the purple dye for several hours (washing machine method).  After it dried, the color was very uneven, but I got to work anyway.

I removed the short sleeves from the linen blouse, cut long sleeves from the capri pants legs, and attached the new sleeves to the jacket.  Then I cut the bottom of the blouse off, made a pointed hem on each side in the front, and added tails to the jacket (which you cannot see in the pics, sadly)–so it looked just like The Joker’s tuxedo jacket. From the scraps of fabric I had removed from the blouse and the leftovers from the pant legs, I made a collar and lapel and attached them to finish the jacket.

THEN… sweetie went back to the supermarket to buy another box of purple dye, and we did the dye bath again, this time on the stovetop–worked great, we got a good solid cover of vibrant purple!  The only problem was, I hadn’t reinforced my seams and the linen blend raveled like crazy and I had to re-sew. every. single. seam.  Ugh.  Disaster averted–one purple Joker dinner jacket complete.  We decided the shirt wouldn’t take the dye anyway, because of the sateen finish, so we left it as is.  Same with the pants, they fit perfectly. Win! I did his makeup, which made the costume, I think:

On to Catwoman.  I cut the bottom of the dress off, removed the belt loops, and attached the “leather” belt at hip level to create the Mod-look 1960s “catsuit”.  The sleeves required slight adjustments to make it fit more closely — maybe a half hour sewing time, tops.  Add to that a pair of black leggings and boots from my closet, and I bought a long red wig at Target for $8.00, and the cat ears and mask from our theatrical shop (painted the mask with black glitter paint and it was good to go), added elbow length black satin gloves, and a necklace from my jewelry box, and voila!

To finish off the Joker costume, we purchased green hair paint and re-painted a wig from last Halloween, and bought bright purple gloves.  I cut the hem from the black dress I cut up for my Catwoman top, and tied it on him for his necktie.